Welcome to your August- 2022 Dream Wardrobe.
UK SIZES 6-30
As a teenager in the 90s I fully embraced the slip dress. Roll on a few decades and 90s fashions are back. Some trends I can happily do without (bumster jeans anyone?). But the classic slip dress is something I am very happy to welcome back into my wardrobe. Kate Moss looked eternally cool in hers and the versatility of this simple garment is absolutely fabulous.

About the fabric:
This month we have an exclusive preview of one of the new Fabric Godmother collection prints. This stunning floral viscose crepe is a reproduction of a vintage print. I love the scattered flowers and the pops of bright colours.
Here are some ideas for other patterns that would work really well in this fabric:
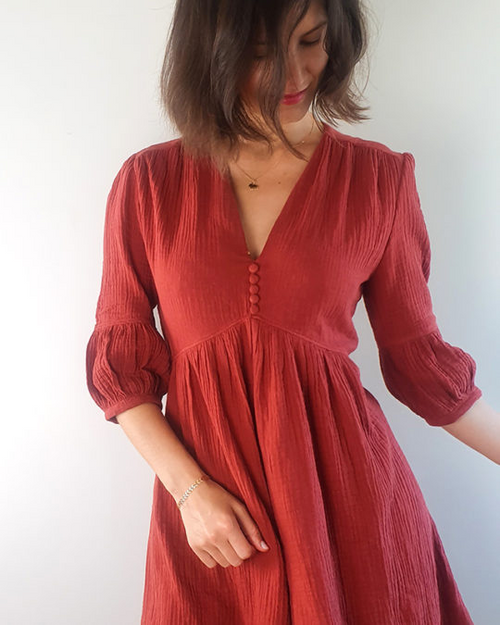
French Poetry Pleiades 1 Dress PDF (Intermediate)

Atelier Scämmit Petites Choses Blouse & Dress (Intermediate)
I always recommend that you pre-wash your fabric. This is especially important with fabrics that are made from natural fibres (cotton, linen, viscose etc) as these have more of a tendency to shrink.
About the pattern:
The Saltwater slip dress is a brilliant quick make. It comes with 2 length options, either above the knee or a long version. Slip dresses look great worn on their own or layered up. Wear with sandals or boots and try playing about with a fitted top underneath and a blazer or cardigan over the top.
I would also love this dress made in these fabrics.

Cloud Flower Viscose Sateen - Emerald

Notions required:
- Matching thread (we have sent you a reel of the Gutermann rPET thread made entirely from recycled plastic bottles)
- Sliders (optional, we didn’t use them)
About your gift:
This month we have included a set of flower pins. These extra fine and long pins are perfect for sewing the viscose crepe. I always use these pins for lighter weight fabrics and I love the fact that the flat heads are heat resistant so you can iron over them. Really handy for sewing bias binding! Plus the fact that they match this fabric is an added bonus!
#fgdreamwardrobe
Want to share your Dream Wardrobe? Use the hashtag #fgdreamwardrobe and share your unboxing and final makes on social media.
Happy sewing, Josie xxx
The Saltwater Slip Dress - Julia's Sewing Tips
Prewash fabric
This fabric shrinks when washing. I found this to be approximately 10% across the weft (selvedge to selvedge) and 2% in the warp. This is pretty much eliminated once the fabric is pressed, but if you don’t intend to press your garment after washing you may wish to consider cutting out a larger size.
Ironing
This fabric irons beautifully and easily. I used almost the maximum heat setting on my iron and a little steam.
Haberdashery / Notions
The pattern states the need for 3/8” (9.5mm) lingerie strap slides and rings set. If you want to purchase these there are lots available from many online retailers. Look for 3/8” (10mm / 1cm) sets. I found some in a range of colours on eBay.
You can make up the dress without the rings and slides, simply ignore pattern piece D (Strap Loops) and omit steps 6 to 8 where the loops are sewn onto the back piece. Attach the Strap Binding (E) as described in step 17 and then position the ends of the straps at the back where the strap loops would have been placed. You can adjust the length of the straps to fit and then fix them in place once you’re happy.
Cutting Out
Look at the body measurements and ‘Finished garment measurements’ to help you choose the right size. I lengthened the dress by 20cm to make it ankle length for Josie. I added 10cm above the markings for the side slit and another 10cm below the markings for the side slit.
When cutting out the bias strips for the Strap Binding (E) Make sure that both strips are cut with the fabric face up (rather than as a pair) so that the diagonal edges align correctly when you sew these two pieces together.
It always seems a bit wasteful to cut long bias strips from fabric so if you’d rather save some of the fabric for another project, you can create a continuous strip of bias binding from a square. A 30cm x 30cm (15” x 15”) square will yield enough bias binding for all sizes XS to 7X.
Watch my video on ‘How to Make Continuous Bias Tape’
Transferring pattern markings
Make sure to transfer all the notches, the small circle markings for the top of the slit and the dark markings. I use a tiny snip in the centre of the notch marking, a snip for the base of the dart and a tailor’s tack for the tip of the dart.
Making up the garment
I used a size 80/12 universal needle as the fabric is lightweight. Make sure to use a fresh (ish) needle as this fabric will easily be snagged by a blunt needle.
The seam allowance on the pattern is 1cm.
I edge finished all the seams with a 3-thread narrow overlocking (serging) stitch. This is my preferred method for overlocking woven fabrics which don’t easily fray. Simply remove and unthread the left needle of your overlocker (serger) to create a narrower stitch.
The first step is to sew the Strap Binding (E) pieces together. Match the raw edges and then slide them so the pointed tips of the strips overhang by 1cm at either. When the seam is sewn, the start and end of the seam line will be correctly aligned.

There are a number of methods to fold and press the bias strips. You can follow the instructions for folding and pressing manually but the quickest and easiest method is to use a bias tape maker. I used one measuring 18mm ( ¾”). If you don’t have a bias tape maker you could try using one of the methods shown in my video ‘4 Ways to Make Bias Tape (Bias Binding)
When staystitching the neckline, keep the stitching approximately 6mm from the raw edge, this way the stitching won’t be seen once the bias binding is applied.
I apply the binding with two lines of stitching, rather than just one. I find that I get better results this way.
- Open out the binding and apply the right side of the binding to the wrong side of the dress so the raw edges meet. Pin this in place.

2. Sew along the crease of the binding.
 3.Trim the seam allowance.
 4. Press the seam allowance towards the binding.
 5.Wrap the binding over the raw edge to the right side of the dress so the folded edge of the binding just covers the last line of stitching.
 6. Pin the binding in place and sew close the fold.

When sewing the darts, I like to mark the lines of the darts onto the fabric first, fold the fabric right sides together so the snips at the base of the dart meet and then pin the fabric so the tip of the dart sits on the edge of the dart.
Sew from the widest part to the tip. Reverse up the fold to fasten off or tie the thread ends in a knot.
You can see my video on how to mark, sew and press single point darts here:
https://www.youtube.com/watch?v=pXwuxb4Sgi8&t=229s
I made the long version of the dress with the side slits. The seam allowance beyond the marking for the slit is 2cm. The slit is sewn closed with a long machine stitch to aid with pressing and finishing the slit. The long stitches are taken out once the slit opening has been finished and the hemming of the lower edge is complete.
I added a bead at the end of each of the side ties.
You can see my video on how I made the Saltwater Slip Dress on my YouTube Channel
https://www.youtube.com/c/HouseofMissSew/videos
More tutorials and videos on techniques can be found at www.houseofmisssew.com or https://www.youtube.com/c/HouseofMissSew/videos