


")


Description
** THIS IS A PDF PATTERN. YOU WILL RECEIVE A LINK TO DOWNLOAD THE DIGITAL FILES IN YOUR CONFIRMATION EMAIL AFTER PURCHASE**
For more information about PDF pattern printing check out our PDF Guide.
**PLEASE NOTE: THIS PATTERN INCLUDES A HOME-PRINTING PATTERN FILE ONLY, IT DOES NOT INCLUDE AN A0 OPTION**
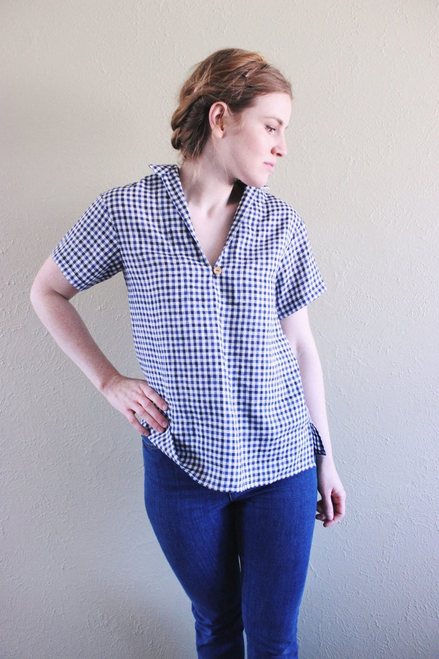
The Heidi Pullover top has straight lines with side slits, no bust darts, short sleeves and the back is gathered into a yoke. It has a straight collar, front slit that opens into a v-neckline with a button and thread loop closure. The instructions include a short video showing how to sew a thread loop, 21 pages of sewing instructions along with 40+ photographs and line drawings to illustrate. The sewing pattern includes sizes 0-16. Please read all instructions before you begin your project.
SIZE CHART - HEIDI PULLOVER
0: Bust 31” / Hip 34”
2: Bust 32 1/2” / Hip 35 1/2”
4: Bust 34” / Hip 37”
6: Bust 35 1/2” / Hip 38 1/2”
8: Bust 37” / Hip 40”
10: Bust 38 1/2” / Hip 41 1/2”
12: Bust 40” / Hip 43”
14: Bust 41 1/2” / Hip 44 1/2”
16: Bust 43” / Hip 46”
FABRIC
Light or medium weight fabric. Woven cotton, lawn, linen,
Fabric Width: 44-45” / Yardage: 2 1⁄4 yards (all sizes)
Fabric Width: 58-60” / Yardage: 1 1⁄2 yards (all sizes)
Interfacing: 20” wide – 1⁄2 yard (all sizes)
NOTIONS
Matching thread
Sewing machine needle for light or medium weight fabric (depending on what fabric you use).
1 button
Embroidery thread or cotton thread to make button loop, sewing needle
PRINTING YOUR PDF PATTERN
After downloading the files to your computer, you can print out the pattern using your home printer. The pattern pages are formatted to fit US standard page size (8.5” x 11”) as well as A4 page size (8.26” x 11.69”). Be sure the printer settings are set to “actual size” and only print the first page that includes the 4” test square before printing the rest of the pattern. Measure the 4” square with a ruler to be sure the pattern pages will print accurately. If the measurements are correct, go ahead and print the entire pattern. Assemble the printed pattern by cutting out the pattern pieces and matching them together by the letters that are marked on each pattern (“A” to “A”, “B” to “B” etc.) and then taping them together.


